Got a leaky toilet that’s driving you up the wall? Before you call a plumber or resign yourself to forever listening to that annoying drip, consider this: the solution might be closer (and easier) than you think. Welcome to the world of DIY plumbing hacks, where rapid fixes can save you time, money, and a whole lot of frustration. In this article,we’ll dive into the best YouTube tutorials that break down the process of fixing a leaky toilet into simple,actionable steps. Whether you’re a seasoned handyman or a complete beginner, these easy-to-follow guides will have your toilet running smoothly in no time. So, grab your tools, fire up your device, and let’s get to work—because a leak-free bathroom is just a video away!
Identifying the Source of the Leak in Your Toilet
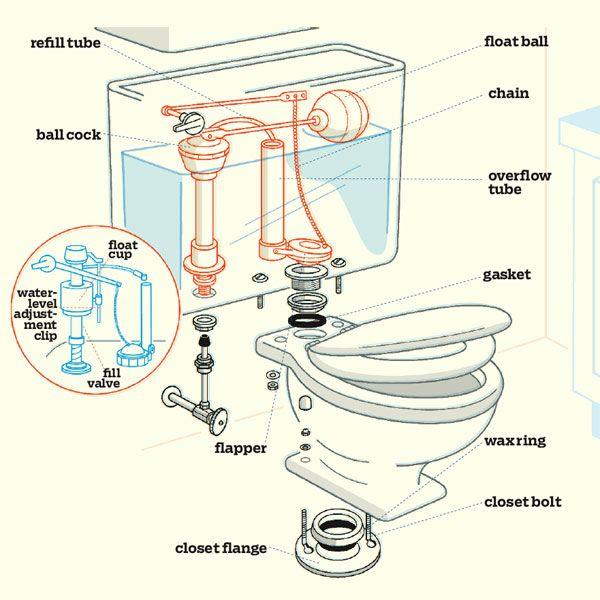
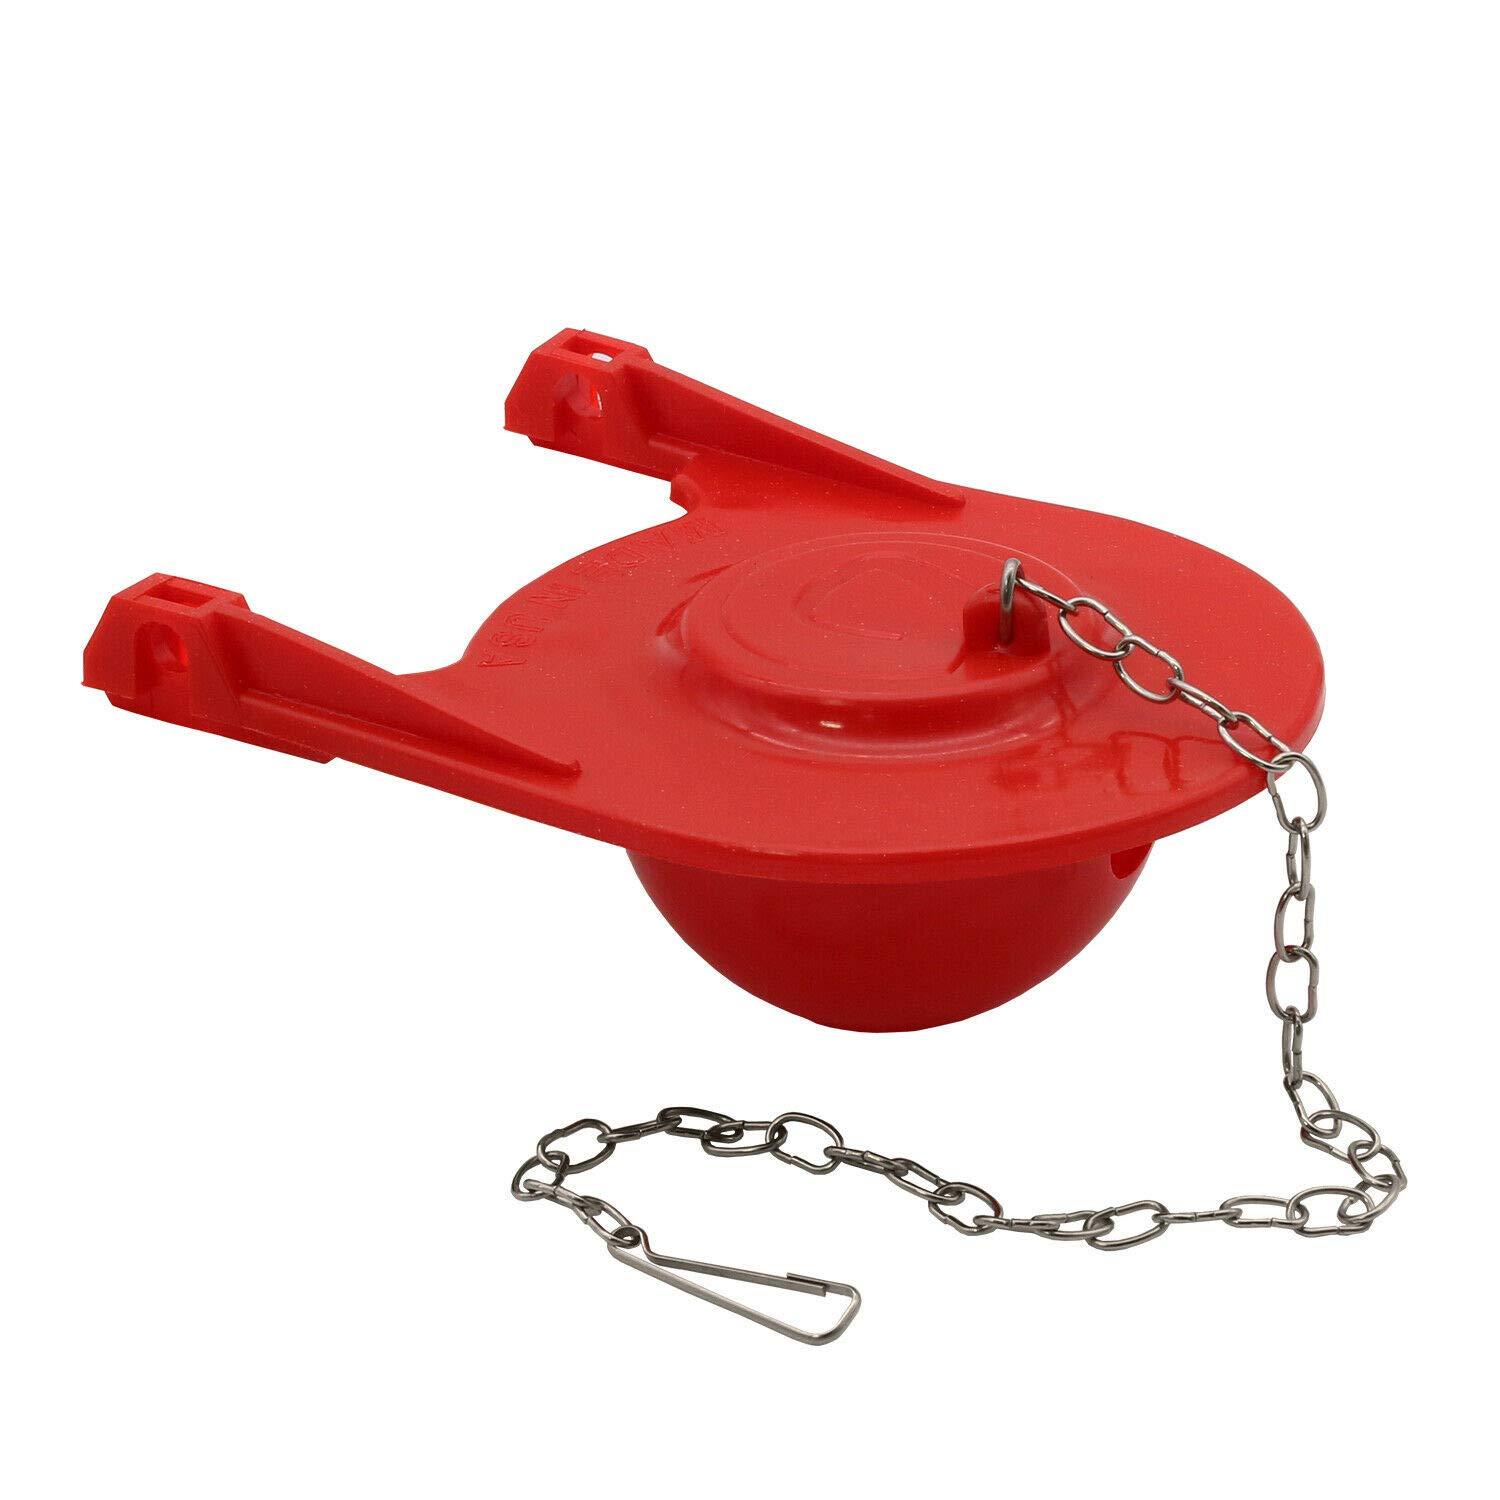
before diving into fixing a leaky toilet, it’s crucial to pinpoint where the issue originates. Common leak sources include the tank, the bowl, or the water supply line. Start by inspecting the tank for cracks or lose connections. Then, check the flapper valve—a worn-out flapper is often the culprit behind continuous water running. Don’t forget to examine the base of the toilet for water pooling, which could indicate a faulty wax ring.
If the leak isn’t obvious, try these simple troubleshooting steps:
- Add food coloring to the tank: Wait 15-20 minutes. If the bowl water changes color,the flapper might need replacing.
- Tighten connections: Use a wrench to secure bolts and nuts around the tank and base.
- Check the water supply line: Ensure it’s not cracked or leaking at the connection points.
| Leak Location | Likely Cause |
|---|---|
| Around the base | Damaged wax ring |
| inside the tank | Faulty flapper or fill valve |
| Water supply line | Loose or cracked connection |
Step by Step Guide to Replacing a Faulty Flapper
Dealing with a leaky toilet can be frustrating, but replacing a faulty flapper is a straightforward task that you can handle yourself.Start by turning off the water supply to the toilet, usually located near the base. Flush the toilet to empty the tank, and then remove the old flapper by detaching it from the chain and unhooking it from the overflow tube. Take the old flapper to your local hardware store to ensure you purchase the correct replacement.
Once you have the new flapper, attach it to the overflow tube and secure the chain to the flush lever.Adjust the chain length so there’s slight slack when the flapper is closed. Turn the water supply back on and let the tank fill. flush the toilet to test the new flapper and ensure the leak is resolved. Here’s a quick reference table for the steps:
| Step | Action |
|---|---|
| 1 | Turn off water supply |
| 2 | Flush and remove old flapper |
| 3 | Install and adjust new flapper |
| 4 | Turn on water and test |
- Always double-check the flapper size for compatibility.
- Ensure the chain isn’t too tight to prevent improper sealing.
How to Tighten and Adjust the Toilet Fill Valve
When dealing with a leaky toilet, one of the most common culprits is a malfunctioning fill valve. Fortunately, tightening and adjusting it is a straightforward process. Start by shutting off the water supply to the toilet, usually located near the wall or floor. Next, flush the toilet to empty the tank. Use a wrench to gently tighten the nut connecting the fill valve to the water supply line—avoid over-tightening to prevent damage.
After tightening, adjust the fill valve to ensure proper water levels. Turn the adjustment screw or knob on the valve to raise or lower the float. Aim for the water level to sit about an inch below the overflow tube. Here’s a quick reference for adjusting different types of fill valves:
| Type | Adjustment Method |
| Float Cup | Pinch the clip and slide the float up or down |
| Float Ball | Bend the float arm slightly to change the water level |
once adjusted, turn the water supply back on and test for leaks. A properly functioning fill valve ensures your toilet operates efficiently and quietly.
Preventative Maintenance Tips to Avoid Future Leaks
To keep your toilet functioning smoothly and avoid future leaks, implementing a few preventative maintenance practices can make a world of difference. Start by regularly inspecting the tank and bowl for cracks or discoloration, as these can signal potential issues. Check the flapper valve for wear and tear, as a damaged flapper is a common culprit behind leaks. Additionally, ensure the water supply line is securely connected and free from corrosion. Tighten any loose bolts or connections, but be careful not to over-tighten, which can cause cracks. consider replacing old components, such as washers or seals, every few years to maintain optimal performance.
Here’s a quick reference table for key maintenance tasks and their recommended frequency:
| Task | Frequency |
|---|---|
| Inspect tank and bowl | Every 3 months |
| Check flapper valve | Every 6 months |
| Examine water supply line | Every 6 months |
| Replace washers/seals | Every 2 years |
By staying proactive with these simple steps, you can extend the lifespan of your toilet and save yourself from unexpected leaks and costly repairs.
Wrapping Up
And there you have it—quick and easy fixes for a leaky toilet that you can tackle yourself, all without breaking a sweat or your budget! Whether it’s tightening a bolt, replacing a worn-out flapper, or simply giving your toilet a little TLC, these solutions are designed to save you time, water, and frustration. Remember, even the smallest leaks can lead to bigger problems down the line, so don’t wait to address them. If you found these tips helpful, don’t forget to like, subscribe, and hit that notification bell for more handy home hacks. Until next time, stay practical, stay proactive, and keep those toilets leak-free!
