In the vast digital expanse of YouTube,where creators share their voices,talents,and stories with the world,there exists a quieter,more secluded corner—a space where content isn’t broadcast to the masses but reserved for a chosen few. whether you’re crafting a personal vlog, sharing a family video, or testing out ideas before going public, the option to keep your YouTube channel private offers a shield of privacy in an otherwise open platform. But how do you navigate this feature effectively? And why might you choose to keep your channel hidden from the limelight? Dive into the world of private YouTube channels, where visibility is optional, and control is key.
Understanding YouTube Privacy Settings and Their Impact
YouTube offers multiple privacy settings that allow you to control who sees your content. Whether you’re a casual creator or managing a business channel, understanding these options ensures your videos reach only the intended audience. Private videos are invisible to the public and can only be viewed by users you explicitly invite, while unlisted videos don’t appear in search results but can be accessed via direct links.Here’s how these settings impact your channel:
- Private: Ideal for personal content or pre-release reviews.
- Unlisted: Great for sharing with select groups without public exposure.
- Public: Default setting for maximum visibility.
Adjusting privacy settings also affects engagement metrics. private videos won’t contribute to public watch time,which may influence monetization eligibility. Below is a rapid comparison of how each setting impacts key features:
| Setting | Visibility | Monetization Impact |
|---|---|---|
| Private | Invite-only | No impact |
| Unlisted | Link-only | Partial (views count) |
| Public | Searchable | Full eligibility |
Step by Step Guide to Making Your YouTube Channel Private
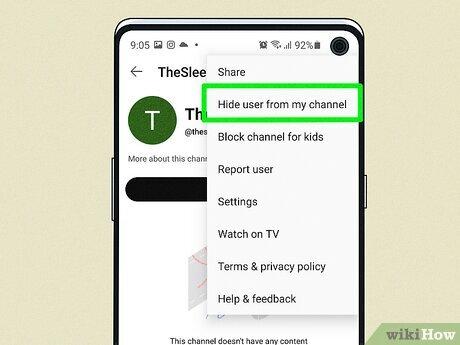
Making your YouTube channel private is a straightforward process that ensures your videos are accessible only to those you approve. Start by logging into your youtube account and navigating to your channel settings. Once there, locate the Privacy Settings section and select the option to make your channel private. This will restrict access to your content, allowing only selected users to view your videos. Additionally,you can manage your subscriber list and remove any unwanted followers to maintain complete control over your audience.
To further customize your privacy settings, follow these steps:
- Go to YouTube Studio and click on Settings.
- Select Privacy from the menu on the left.
- Adjust the visibility of your videos by choosing between Public, unlisted, or Private.
| Setting | Description |
|---|---|
| Public | Visible to everyone on YouTube. |
| Unlisted | Accessible only to those with the link. |
| Private | Restricted to selected users only. |
By following these steps, you can ensure that your YouTube channel remains hidden from unwanted viewers while maintaining full control over your content’s accessibility.
Managing Content Visibility and Audience Access Effectively
sometimes, sharing your YouTube videos with the entire world isn’t the goal. Whether you’re creating content for a specific group, testing new ideas, or simply keeping things personal, making your YouTube channel private can be a strategic move. By adjusting your channel’s visibility settings, you gain full control over who sees your videos. This ensures your content is accessible only to those you trust or select, making it an excellent option for private tutorials, family updates, or exclusive team collaborations.
Here’s how you can manage your channel’s privacy effectively:
- Private Videos: Upload videos and set them to private so only people with the direct link can view them.
- unlisted Content: Share videos with a broader audience without making them public by using unlisted settings.
- Channel Privacy: Restrict your entire channel to authorized users only, ensuring complete privacy.
| Visibility Setting | Best Use Case |
|---|---|
| Private | Personal or selective sharing |
| Unlisted | Limited audience access |
| Public | Wide-reaching content |
Best Practices for Maintaining Privacy Without Sacrificing Engagement
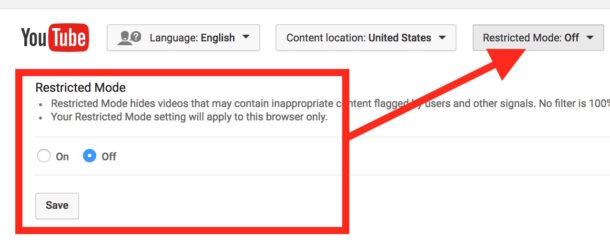
Balancing privacy and engagement on YouTube doesn’t have to be a compromise. Making your channel private can be a strategic move to protect your content while still fostering a dedicated audience. Hide your videos from the public but share them selectively with trusted viewers or collaborators. This ensures your work remains safeguarded while maintaining meaningful interactions. Additionally, consider enabling Restricted Mode to limit access to sensitive content, creating a safer viewing surroundings.For creators who still want to engage, use unlisted videos—these can be shared via direct links, allowing you to control who sees your content without exposing it to the broader YouTube audience.
Here are some tips to optimize your private channel:
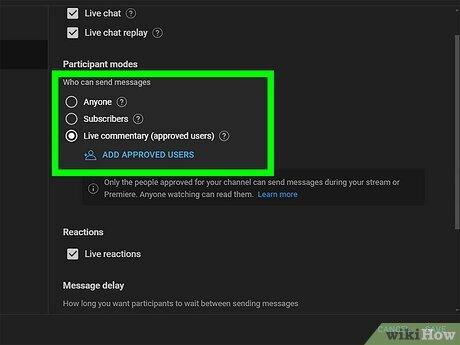
- Customize Sharing Permissions: Share videos with specific groups or individuals to maintain exclusivity.
- Leverage Collaborative Playlists: Curate content for select viewers without making it publicly available.
- Monitor Viewer Activity: Use YouTube Studio to track engagement metrics for unlisted or private videos.
| Feature | Best Use Case |
|---|---|
| Private Videos | Personal archives or restricted access |
| Unlisted Videos | Selective sharing or limited distribution |
| Restricted Mode | Family-friendly or sensitive content |
To Conclude
Outro:
And there you have it—your YouTube channel is now your private sanctuary, a space where only your chosen audience can peek behind the curtain. Whether you’re safeguarding memories, fine-tuning content before the big reveal, or simply keeping things exclusive, privacy gives you control in an ever-connected world.
So go ahead—curate, create, and share on your own terms. After all, some stories are best kept between you and those who truly matter. Ready to toggle that visibility? Your private corner of YouTube awaits.
Until next time, keep it quiet—or make some noise when you’re ready. 🎥🔒