Imagine this: you’re knee-deep in a productivity groove, juggling tasks like a pro, when suddenly, your favorite YouTube video beckons. But pausing your workflow to switch tabs or windows? No,thank you. Enter the YouTube Miniplayer—an unsung hero for Mac users who crave seamless multitasking. This tiny yet mighty tool allows you to keep your video in view while conquering your to-do list, blending entertainment and efficiency effortlessly.Whether you’re a seasoned multitasker or just dipping your toes into the world of productivity hacks, mastering the YouTube Miniplayer on mac is a game-changer. Ready to unlock its full potential? Let’s dive in.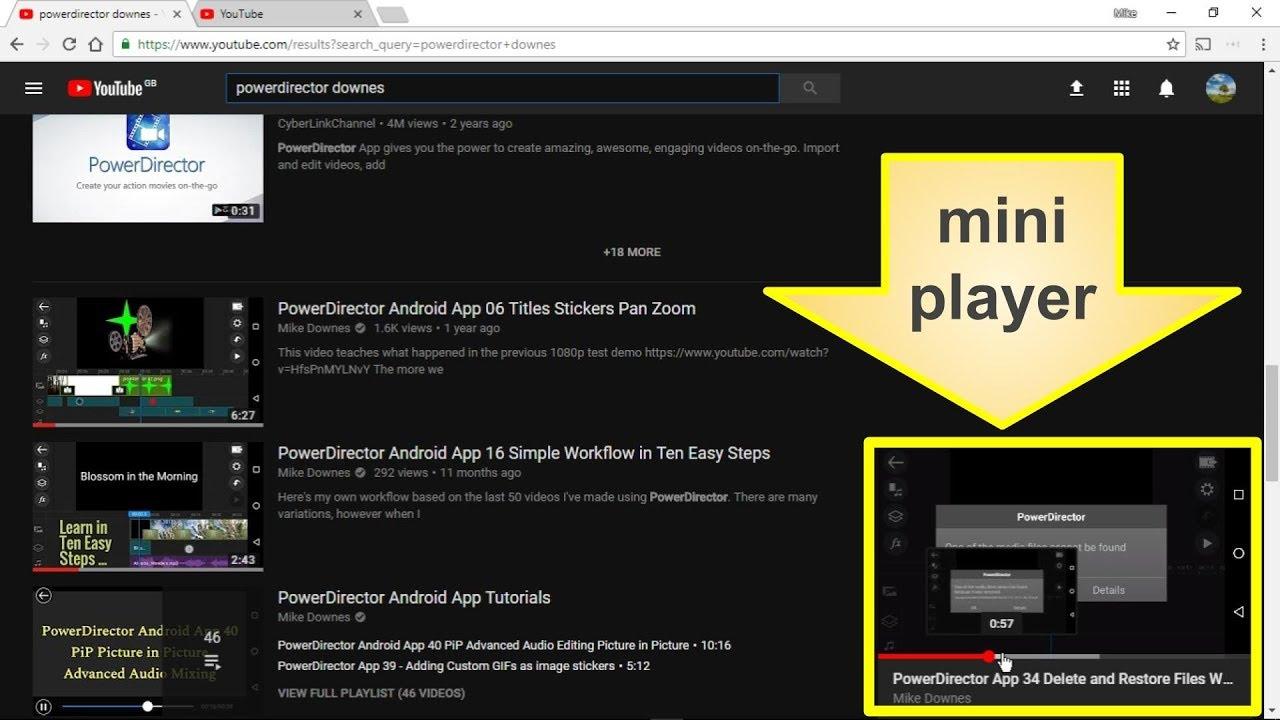
unlocking the Power of the YouTube Miniplayer for Enhanced Productivity
Harnessing the YouTube Miniplayer on your Mac can transform how you manage tasks and consume content together.This feature allows you to keep a video playing in a small, resizable window while navigating other applications or tabs. Here’s how to make the most of it:
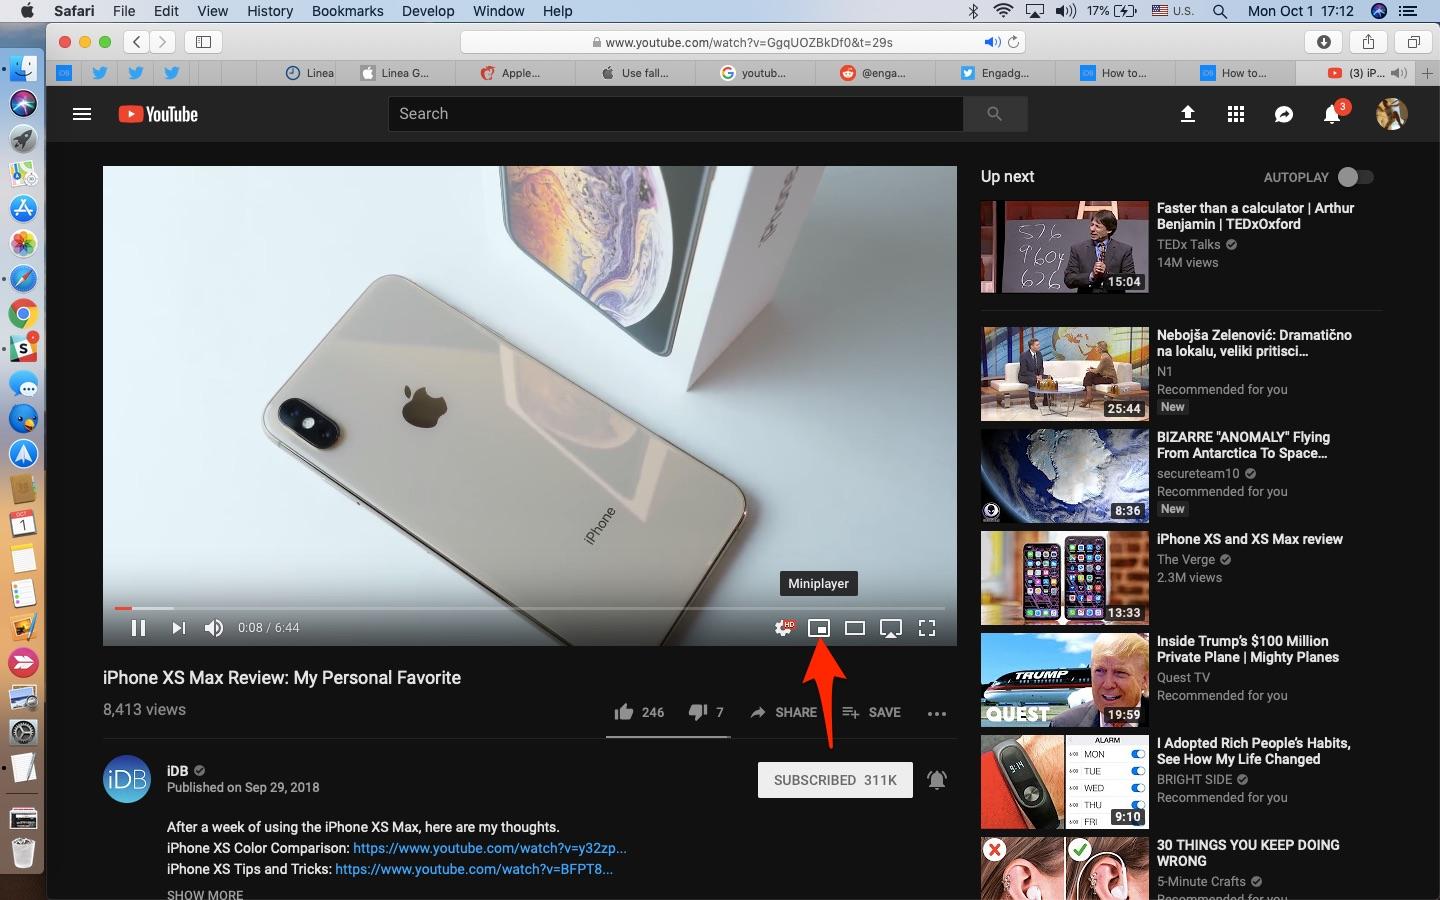
- Activate the Miniplayer: Click the Miniplayer icon below the video or use the keyboard shortcut
Shift + Command + Mto instantly shrink the video. - Resize and Reposition: Drag the edges to adjust the size or move the window to any corner of your screen for optimal placement.
- Stay Focused: Use it for background tutorials, podcasts, or music while working on spreadsheets, emails, or creative projects.
To further enhance your multitasking experience, consider pairing the Miniplayer with other productivity tools. For instance, you can use split-screen mode on macOS to keep your workspace organized. Below is a fast guide to combining these features effectively:
| Task | Tool | Benefit |
|---|---|---|
| watching tutorials | YouTube Miniplayer | follow along while working |
| Organizing Workspace | macOS Split-Screen | Maximize screen real estate |
| Background Music | Miniplayer + Spotify | Boost focus with curated playlists |
Customizing Your Miniplayer Experience for Optimal Viewing and Efficiency
Enhance your YouTube Miniplayer experience on Mac by tailoring it to your workflow. Start by resizing the Miniplayer to fit your screen perfectly—drag the corners to adjust its dimensions.Use the keyboard shortcuts like Shift + Command + M to quickly toggle the Miniplayer on or off, ensuring seamless transitions between tasks. For better focus, enable dark mode in YouTube settings to reduce eye strain during extended viewing sessions.
Maximize efficiency by customizing playback settings. Here’s a quick guide to optimize your Miniplayer:
| Feature | Benefit |
|---|---|
| Auto-play | Keeps your playlist running without interruptions. |
| Playback Speed | Adjust to 1.5x or 2x for faster consumption. |
| Picture-in-Picture | Watch while working in other apps. |
Additionally,consider using browser extensions like Enhancer for YouTube to add features such as volume boost or ad-blocking,further refining your miniplayer experience. These tweaks ensure you stay productive while enjoying your favorite content.
Advanced Multitasking Techniques with the YouTube Miniplayer on Mac
Maximize your productivity by leveraging the YouTube Miniplayer on your Mac—a powerful yet often underutilized feature. Whether you’re catching up on tutorials, listening to podcasts, or enjoying background music, the Miniplayer lets you keep content playing while you work on other tasks. Here’s how to make the most of it:
- Drag and Drop: Simply grab the Miniplayer and position it anywhere on your screen for an unobtrusive viewing experience.
- Keyboard Shortcuts: Use
Shift + Pto quickly toggle the Miniplayer without interrupting playback. - Resize for Focus: Adjust the Miniplayer’s dimensions to balance visibility and screen real estate.
| Action | Shortcut/Feature |
|---|---|
| Pause/Play | Spacebar |
| Skip Forward/Back | Arrow Keys |
| Exit Miniplayer | Esc |
For an even smoother workflow, pair the Miniplayer with macOS’s Split View or Stage Manager. This way, you can watch videos side-by-side with your notes, emails, or creative tools. pro tip: Enable Picture-in-Picture for supported videos to detach playback entirely, giving you ultimate versatility. With these techniques, you’ll transform YouTube into a seamless multitasking companion.
Troubleshooting and Pro Tips to Maximize Your Miniplayer functionality
To make the most of the YouTube Miniplayer on your Mac, start by ensuring your browser is up to date. An outdated browser can cause glitches or prevent the Miniplayer from functioning properly. If the Miniplayer isn’t appearing,try refreshing the page or restarting your browser. For smoother performance, disable unnecessary extensions that might interfere with YouTube’s functionality. Additionally, use keyboard shortcuts like Shift + P to quickly toggle the miniplayer on or off, saving you time and effort.
Here are some pro tips to enhance your Miniplayer experience:
- Resize the Miniplayer by dragging its corners for a custom viewing experience.
- Use picture-in-Picture (PiP) mode for even greater multitasking flexibility.
- Keep your Mac’s performance optimized by closing unused apps to prevent lag.
| Issue | Quick fix |
|---|---|
| Miniplayer not appearing | Refresh the page or restart the browser |
| Lag or stuttering | Close background apps or reduce video quality |
| Keyboard shortcut not working | Check for conflicting shortcuts or update browser |
To Conclude
And there you have it—your ultimate guide to mastering the YouTube Miniplayer on Mac! With these tips, you’re now equipped to seamlessly blend entertainment and productivity, turning your screen into a multitasking powerhouse. Whether you’re catching up on tutorials, jamming to your favorite playlist, or staying updated with the latest trends, the Miniplayer ensures you never miss a beat—or a deadline. So go ahead, experiment with these tricks, and make your Mac work smarter, not harder. Happy multitasking, and may your workflow be as smooth as your streaming! 🎥✨